Monday, October 3, 2011

More Love -- Less Bling

I have just returned from a cousin’s wedding in Bergamo Italy. The couple was, as was my grandfather, Waldensian--an ancient and obscure Protestant French-Italian sect that was documented long before the Reformation, and who lived hidden in the Alps, often in rocky caves, for centuries. The wedding was elegant and simple, as is the way among this sect. It was, however, still Italian; and following the service we sat down to a banquet that lasted no less than six hours.

The service itself lacked the decorations and majesty one might expect from an Italian Catholic mass. This was in a plain room...OK, it was a castle, but the chapel was quite simple nonetheless. There were no icons, and few attendants--a best friend as the groomsman, and the sister attending the bride. Some of the songs, like Amazing Grace, were familiar, chosen perhaps with the American contingent in mind. The others, less familiar, were haunting and delicate, no doubt ancient Waldensian hymns.

What came through the simplicity of the service was gentle, loving, attention. It was there in the eyes of my cousin and his beloved, between the people and their faith, and even in the banquet afterwards. Yes, it all comes down to food; and I learned so much about the secrets of a good meal by being part of it all.

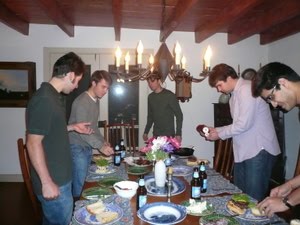
Here is the menu: (Forgive me, I just couldn't bring myself to whip out the camera during the banquet...)

Shrimp with orange zest and aioli
Potato, mushroom and cheese tart (quiche, really)
Vegetable risotto
Sorbettos (grapefruit and green apple)
Pork loin in puff pastry with some accent greens
Selection of mousses
Wedding cake

A truly elegant meal, even a six-hour one, is as balanced by restraint as it is generosity. Overwhelming your guests, even with your largess, can itself become burdensome. In the case of this banquet, they did things so delicately that six hours of eating was pure joy! How did they do it???? It’s left me wondering, ‘What is the secret to hosting a large banquet or an intimate dinner that keeps people receptive and excited for whatever is next?

Let there be a reason for everything you plan to offer up. Here are a few tips:

1) Know who are your guests are and what they will be requiring. Health issues, age, lifestyle all come to bear when thinking about how much you want to serve. At this banquet, most of the courses were small and adorned only with a vegetable accent --a good plan for any guests who are eating for six hours! Although each was perfectly flavored, none of them was creamed up with sauce and such. When I’m serving ladies of ‘a certain age’, I’m less likely to pound out huge burgers and big smeary desserts. (I save all that for my son’s starving college friends.) Instead, I’m more likely to have small servings of one thing or another in ramekins or beautiful plates.

2) Go with a theme, even as simple as being seasonal. What’s in the markets, what’s in the air, what’s the celebration? The nice thing about a theme is that the guests know a little of what to expect, yet you have a jumping off point to be whimsical. Somehow, the whimsy is less chaotic and random, more appreciated.

3) Think of food as functional art. Everything offered should have a purpose and a plan. Serving in courses makes the meal flow more like a performance rather than a simple feeding, giving more attention to each menu item. The appetizer should not overwhelm your guests or fill them up (unless that’s all you’re offering--then you should call it hors d’oeuvres). Keep it light, and with something salty and/or tangy that stimulates appetites. The rest of the meal should progress in flavor and substance, punctuated perhaps by salads with an acidic vinaigrette, or not-too-sweet sorbets which provide a little relief between heavier courses. If I can, I keep the creamiest things to the end.

4) Keep a sense of timing. During my cousin’s banquet, for instance, the sorbetto and desserts were served buffet style, allowing people to stand up and mill around the room a bit. It allowed a longer break than you’d expect if you remained sitting. “Thank God!” I said. It made the main dish and dessert course so much more attractive! I thought it was a brilliant move.

Elegant hospitality, at its best, is love. Not the kind that wows the guest into intimidation, or burdens them with too much. It honors and comforts them, connecting them to the celebration, the times, each other, and you.

Speaking of celebrations, did you know Ezekiel’s Table is offering a new class each month? Full Moon Feast, I’m calling it. (My favorite time to celebrate!) You can come alone or with a couple of friends, and take it a little more easy. Read more about 'an option for individuals and small groups' on my website.

Wednesday, August 31, 2011

Strange Little Eggplants from the Farm Store

I know, I know. I said I wouldn't post before my trip, but I couldn't stop myself.

Today the Z Food Farm is open down the street. And I have something to tell them. They sold me some small white eggplants that were being overlooked last week, so they probably wont continue to sell them. They were called 'uovo bianco' or something like that. No bigger than a small sized chicken egg and pure white, I immediately thought of them as hors d'oeuvres, and thought of stuffing them.

This is what to do ...
For eight tiny eggplants:

Preheat oven to 375 degrees F
Peel the eggplants, and cut off the tops and with a melon-scoop. Carefully scooped out the center. Interestingly, the first scoop is almost all eggplant, which you will keep for stuffing. The second scoop is mostly seeds, which you can throw out. As you scoop out each eggplant, salt the inside and outside to keep it from turning brown too quickly. Then cut a thin slice off of each bottom, so the eggplants wont roll.

For the stuffing, you can try to use any left-overs: a bit of rice or meat, I used some day-old bread (a great use for homemade bread you can't bear to throw away...).

Dice and sautee in olive oil until well cooked and dry:
1 small onion
2 cloves garlic
1 tomato, (slow roasted, if possible) or a Tbsp tomato paste
the eggplant balls

Add to this 1/2 cup of stale bread, or rice, quinoa, what-have-you
Herbs, (I used parsley, oregano, thyme, and basil)
2 tablespoons Parmesan cheese
Salt and Pepper to taste (remembering there is a bit of salt already on the eggplants.)

Sautee a little longer 2-3 minutes.

Back to the peeled and hollowed-out eggplants. Blot them and stuff them with the filling you just made.
Brush the outside of each with olive oil and place them into a dish small enough to keep them stable.
Add 2 tablespoon stock
Sprinkle with 1 tablespoon more of Parmesan cheese
Cover with foil and bake for 30 minutes, then uncovered until eggplants are very tender.

I'm taking these on over to the farm stall and ask them to keep growing those weird vegetables. We'll learn to use them, just give us some time!

P.S. You don't want to waste these veggies. So, if you have any left-over stuffing, add it to eggs and milk (2 tablespoons milk per egg) and bake it as a custard.

Friday, August 26, 2011

Spending Real Money for the Real Thing


...And Thoughts On Watermelon Soup!

Why is it that when I shop at big supermarkets I buy more than I mean to, and spend more than I have? I try to get through the line almost sheepishly, knowing I'm just one more person the cashier has to deal with before he/she goes on break. Then I come home with stuff and packaging, with what may or may not even be food, feeling my life is just more cluttered instead of more full.

When I go to the farm stand, it's different. I buy less (but it seems to last the week), I pay a fair sum (but nothing to match the impulse purchases I make at the the big stores), and I feel my life is somehow better ordered.

I think it is because our buying speaks to a deeper human need than simply getting. It is about exchange. When I do business, I want to have a conversation with somebody about what I am about to buy, or what I bought last week (and hopefully used to create a really cool dish). I want to feel that they are glad I'm giving them my money, and that it is real money I'm giving them-- (not just zipping a card for some unspoken amount). I want it to matter that I was there, because they want to keep doing what they do.

So, since it is Friday, I went to my favorite farm store down the street Z Food Farm run by Dave Zaback (on Lawrenceville Pike just before the 95 on-ramp). I had a long talk with chef-farmer Greg (a darling young man with bad-boy scruffy hair) about which vegetables go best with gin and vodka. I'm afraid I kept him too long, as he had to ring my stuff up twice. I just love going there! Their farm store is even better than the farmers market because they are not so deluged with customers and they have the time to tell you about everything they have to offer (and what's especially good!) Plus, you get to talk RECIPES!!!! To top it off, David Z gives me all his extra produce, which I take to the Trenton Area Soup Kitchen! Z Food Farm is open Wednesday, Friday and now Saturday.

So, this week I've been into their watermelon. (I used it in one of my Ezekiel's Table classes, made it three times myself, and I still can't wait to eat more!) This is how it's done:

Watermelon Soup with Summer Herbs

I use a food mill set on the coarsest setting. It results in a deeper, richer
color and a pleasing, uniform texture. (The coarse setting leaves a nice little something to chew on, and it takes out most of the seeds.) If you're in a hurry, the blender or food processor is fine, but you will get a more foamy, pastel soup instead of that beautiful jewel red nectar.

1 large handful of basil, and/or other herbs such as lemon thyme, or rose-scented geranium
6 cups watermelon chunks
1/4 teaspoon fresh ginger
1/2 teaspoon olive oil
1 pinch salt

Throwing the herbs in first, run the watermelon through the mill. Add the remaining ingredients. Give it a stir and you're good to go. Really, this stuff is like candy (if the watermelon is as good as the Z Farm ones!)


Enjoy the rest of Summer!!!!

And if you haven't already heard, I'm off to Italy next week and Ireland the week after that. I'll be back with recipes and stories. When I return, you can start to schedule your parties for Fall and Winter!

--Marcia W.
Ezekiel's Table

Thursday, July 28, 2011

Perfect Crumpets


OK, maybe it’s not time for crumpets in the best of circles...I hear that no self-respecting Scotsman would have one before late fall. But I fell into a crumpet mood here in the dead heat of summer in New Jersey, and there was no turning away from the thought of one: warm, crispy on the bottom, tenderly perforated at the top by a multitude of holes that suck up melted butter and jam into a bewilderingly crunchy, yet chewy and custardy, sweet, oozy, and buttery snack.

Crumpets are infuriating, however. I knew they had to be fantastic the way they are always written about so fondly in British novels. But frankly, they have only been a disappointment in real life. I have never found a decent one to buy anywhere. Sitting as they do for days in plastic, they taste old and rubbery. (Think putting a week-old pancake in a toaster.) If you can’t eat them the moment they are made, it is better just to forget them altogether.

Making them at home is not so easy either. They seem simple enough, if you aren’t afraid of baking with yeast. But until this weekend, I had not been able to make one that was worth the calories, and certainly not one that lived up to its romantic, comforting and scrumptious reputation. Sure, they’re crispy enough, but they tend to be flat, and lack the essential holes which sponge up butter and jam. Like I said...That all changed this weekend.

A newspaper writer was coming over to interview me on the re-opening of my cooking school. I thought I’d set an artful scene with a few crumpets temptingly browning on the stove as he walked through the door. Yeah, it was a gutsy move, as I had yet to achieve anything even close to crumpet success. Somehow the day felt special, however, and I knew this particular writer was a kind fellow. He deserved a decent crumpet. It was a good day to try.

I had read a thousand recipes in my years, but the most inspiring account of a crumpet is a YouTube clip by the Hairy Bikers. They give some great tips on technique, but reliable measurements? Not so much. So, I reviewed the video, if only for laughs, then rolled up my sleeves and prayed to the kitchen goddess (and the Hairy Bikers).

Up until then, it made sense to make the crumpet dough as rich as possible--butter, eggs, milk. This time was different. The Hairy Bikers didn’t do that--they only used milk. And oddly enough, I neglected to use even that. Yes, I used almost nothing but flour and water. It could have been the stuff of prison food. Yet, that is all that was needed to make the perfect crumpet. As with so many things in life, plain stuff done with care and finesse creates treasures.

The trick is using two leavenings (yeast and baking soda), a cast iron griddle, the perfect heat, and...a particular technique at the end! Make at least one tester crumpet that will probably be thrown away. In fact, it’s best to plan on going through an entire batch or two at the beginning. It hurts to waste, but the waste is all up front...I now can make perfect crumpets...and trust me, they will all get eaten from now on!

In a small bowl add:
2¼ cups warm water
1 package yeast 1 teaspoon sugar

Stir and allow to rise about 10 minutes while you assemble the dry ingredients. Combine in a bowl and whisk thoroughly:

2 cups all-purpose flour
2 tablespoons gluten flour
1 tablespoon sugar
1 teaspoon salt

Add the yeast-water and beat for about 4 minutes. (As with all yeast doughs, mix in the same direction.) It may be necessary to add a bit more water, as this should be a very wet dough--too wet to handle--almost like a thick pancake batter but more viscous. Cover with a cloth and let rise in a warm place until bubbly and double in bulk--45 minutes to an hour.

Remove the cloth and add to the mixture:
½ cup water mixed with
½ teaspoon baking soda


Cover again and set the dough to rise for another ½ hour while you put a large cast iron pan or griddle on to a low heat. Butter as many 4-inch metal rings as will fit, and place them on the heating pan/griddle. Allow them to warm for the entire time you are letting your dough rise, which should finally look quite bubbly.


You are ready to make your first crumpet!
Put just a bit of butter on the cooking surface. Without disturbing the dough any more than is necessary, gently scoop ⅓ cup of the mixture into each ring (or just one ring if you are doing a ‘tester’). Allow this to cook undisturbed for a few minutes. The top should begin to form bubbles as the crumpet rises in its protective ring to a heavenly ½ to ¾ inches thick, and dries out--
the way a pancake does.


Now is the trick. Traditionally, one cooks only one side of the crumpet, much like an egg done sunny-side-up. Typically, however, people like to remove the crumpet from its ring and flip it over to brown the holey side, resulting in a perfect toasty top. The problem is two-fold: both the ring-removal and the turning usually flattens everything, leaving you with only the memory of the lightness that crumpet once had.

As it turned out with the writer, the crumpets had been flattened in this way, and half of them were burning as when he walked in the door. (As I said, he was kind about it.) The ones I served had a decent texture, and he did have a sense of what they could have been. The minute the writer left, however, I went back to the stove.

The solution to the problem was inspired by a further viewing of the Hairy Bikers video. At the end, they toast their perfect crumpets over the fire (on the beach, actually!) Lacking a beach front fire, I tried toasting the crumpet tops over my gas flame for that romantic fire-toasted taste without the flattening flip! It worked remarkably well. Still, removing them from the ring I flattened my creation again, and the tongs flattened the crumpet further.

One is tempted to whisper, “Those blasted rings!” But as so often happens in life, the two problems mutually offer the solution!

Keeping the crumpet in the ring while using their metal sides (and not the crumpet) for clamping the tongs allows one to toast the holey top over the flame! It’s perfect. The top has a fire-roasted finish on its scrumptiously holey surface, and the extra cooking stabilizes the delicately risen crumpet enough so as to allow removal from the ring with a quick circling with a sharp knife. Wipe or rinse the rings and place back on the griddle to heat for re-using.

Serve the crumpets immediately smothered in good butter and jam or honey.


Photos by Kylie Springman, New York

Wednesday, April 13, 2011

Time for Nettle Pie!


Yes it's Time!

This early spring day with it’s cloud canopy, rain and wind is not getting me down. And do you know why? The nettles have sprung, and I love to cook with nettles! Yes, I’m talking about those omnipresent spiky weeds you never notice in the woods until you brush by them accidentally. First you feel a tingle which quickly elevates into a blistering sting followed by a rash that will last for a few days. Yep, those are the ones.

Who would know how good they taste? They have a lovely hearty herb-y flavor that is as close as I’ve found to the wild greens I used to gather in the mountains of Crete and eat with olive oil. Horta, they called it. I just called it ‘joy’ and I feel the same way about nettles. They also are amazingly nutritious and even do wonders for your tummy, skin and hair.

I have a bit of wilderness on my land where I was lucky enough to discover a large stand of those ornery friends a couple of years ago. Today I ventured out to that patch with gloves, scissors and a large bowl. Snipping the young herbs that were just peeking above the leaf cover, I gathered them into the bowl and carried them reverently back to my kitchen, where I covered them with water and a bit of salt. (Soaking them in the bowl with salt water removes some of the sting and draws out any insects.) The strange thing about the sting of those nettles is that it is gone in a flash as soon as the leaves come in contact with heat or are rubbed with salt. Drying them will do the same.

Today I’ll make a Macedonian Nettle and Cheese Pie. While it is best to get those nettles when they are young, I’ll continue to run out to that bit of wilderness from time to time all summer and snip the tops of the lengthening stalks (as one should use only the top 4 inches of the plant for eating). For a flavorful nutritious boost I chop them up and throw them into soups or anywhere I would normally use cooked spinach. You can even make a strained tea with the lower parts of the stalk and splash it on your face or use it as a hair rinse. (I even use nettle extract in my homemade skin cream.)

Nettles offer an important life lesson right there on the plate. They remind us that there are fewer enemies out there if one simply knows how to be with things. In a dark sort of way, I’ve just turned the table on them (so to speak), and made the nettles more afraid of me than I am of them! Then again, maybe they like me too. That stand of them in my wilderness I protect vigilantly, and they in turn yield to me their first sproutings of Spring.

Macedonian Nettle and Cheese Pie

From The Cooking of the Eastern Mediterranean cookbook by Paula Wolfert

Filling:
¾ to 1 pound young nettle tops
Coarse salt (optional)
1 tablespoon olive oil
6 scallions, chopped
2 tablespoons snipped fresh mint
1 cup ricotta
1 cup (4 oz) grated fresh unsalted mozzarella
Salt and freshly ground black pepper to taste
2 eggs, lightly beaten
2 to 3 tablespoons heavy cream

Early in the day (or the day before), make the dough below.

1. Wash the nettle tops under running water. Rub with the salt or blanch in boiling water until wilted, then drain and squeeze out moisture. Chop coarsely. Makes about 1 ¼ cups.
2. In a medium skillet, heat the oil, add the scallions, and cook, covered, over medium heat 2 minutes, stirring, or until soft. Add the nettles and cook about 2 minutes, stirring, or until the oil has been absorbed; transfer to a plate to cool.
3. Preheat the oven to 375 degrees F.
4. In a mixing bowl, combine the greens, mint, and cheeses; add salt and pepper to taste; mix well with hands. Stir in the eggs. If the filling seems very dry, add the cream. Makes 1 quart filling.

Homemade Pastry Dough with Olive Oil
10½ oz (2 cups) all-purpose flour (plus more for kneading)
½ cup seltzer or soda water or 1 cup water and 1 teaspoon baking powder
½ cup olive oil, plus more for brushing the dough
1 ½ teaspoons white or cider vinegar
1 teaspoon salt
Approx. 3 cups filling

1. To make the pastry, place all the ingredients in the bowl of a food processor. Process 20 seconds. On a lightly floured work surface, knead the dough for an instant, form into a ball, wrap in plastic, and chill at least 4 hours; better, chill overnight.
2. Meanwhile, prepare about 3 to 4 cups filling (see above).
3. Divide the dough in 2 parts. Roll out one piece of dough to make a 12-inch round. Brush with olive oil. Place a small ramekin in the center of the dough. Make 8 radiating spokes, at equal distances from the rim of the ramekin to the edge of the pastry. Remove the ramekin. Working clockwise, fold “wedges” one on top of the other to create a small packet. Leave to rest 10 minutes. Meanwhile, repeat with the second round.
4. Roll the first packet of dough to line a 9-inch oiled tart pan or pie plate. Spoon the filling into the shell. Roll out the remaining dough just large enough to fit over the top of the pie shell and place it over the pie. Trim the edges, brush the top with olive oil, score the surface, and bake in a preheated 375 degree F. oven until golden brown and well puffed. about 45 minutes.

Wednesday, March 2, 2011

Ellie's Birthday Bacon Burgers

This is Ellie, a Princeton student from Tennessee. And here are her birthday friends (including my son, Tucker far right)


My husband was out of town, and I thought I'd be dining alone; but a 5pm call from my son changed all that. "Mom, a bunch of us are coming over in an hour. Ellie's dad gave her some great bacon for Valentine's Day and we want to cook it up tonight. It's her 21st birthday. Do you have any beer?"

Ellie's father's friend decided that he wanted to make the world's best cured bacon, and did just that. He called it Viola's Best Bacon (and Ham). Now, even though his website is not yet up, he and his bacon are flown to restaurants all over the country because everyone wants to eat the stuff; and here it was, coming to my doorstep with a party! (I don't know about you, but my 21st birthday didn't look anything like this.) I know she has many more friends, but they weren't yet twenty-one, so they couldn't have any beer.

So, the kids all showed up at dinnertime, and we set to work making the best dinnertime backdrop for an excellent bacon, BURGERS! We fired up the grill and threw on the meat. We made them extra-special by bringing pickled onions, crumbled buttermilk blue cheese, and slow-roasted tomatoes to the table. After an initial sampling of the bacon exquisitely alone, everyone assembled their own idea of 'The Perfect Burger'. Paired with some excellent beer, it was great time. And because it was finals week, it was over too soon.

Having a kitchen that is made for cooking, just down the street from a university, is my idea of heaven. So were the burgers. HAPPY BIRTHDAY ELLIE! Keep up the good work!

If you are interested in the Bacon, here is some contact information:


Viola's Best Bacon
ramseywt@gmail.com
Ramsey Farms
PO Box 5
Viola, TN
37394

931-635-2677

All hogs raised outdoors (not on concrete).
USDA killed and cured.


Saturday, February 12, 2011

Quaker Soup Day

I have to feed the Quakers from time to time...like tomorrow.

Now Quakers, as a rule, are a hard to define bunch. There is a reason they are called 'united anarchists', you know. But one thing about them is this: as flexible as they can be, they do tend to live at the cutting edge of health food trends. I was once handed a bottle of stevia after making a dessert too sweet. 'Vegetarian options' were offered at their gatherings well before Diet for a Small Planet was published. So, it comes as no surprise that when I have to feed them, I must consider the strong possibility that several will be vegetarian, some vegan, some gluten-free, some dairy free, and some nut free. Also, it can't be too weird because Quakers have children and they have to eat too. Of course there are the raw foodies. I just feed them nuts. And for myself, because I too am a Quaker too, I like to keep it cheap and uncomplicated.

So, on the days that we have a longer-than-usual time together I try to make a soup that will satisfy all the possibilities. I'll call it Quaker Soup Day. It happens once a month.

Today, I made a Thai Butternut Squash Soup. It covers all those bases, and tastes wonderful on cold winter days. It is spicy without being too 'hot' (in a picante sort of way), so it warms your bones without causing pain; and it is full of that beta-carotene we need so much this time of year; finally, it is just a bit exotic, so it helps combat some of that cabin fever we all seem to be feeling.

Butternut Squash Soup for a Crowd
Makes a big pot
2 tablespoons coconut oil
2 large onions, chopped
1 large butternut squash, peeled, seeds scooped out, chopped into 1-inch pieces
2 tablespoons rice
2 quarts vegetable stock
1 can coconut milk
1 pinch of cayenne
2 tablespoons red Thai curry paste
2-4 stalks lemon grass, halved lengthwise then cut into 2-inch lengths
2 tablespoons soy sauce
2 kefer lime leaves or 1 fresh lime with zest
salt to taste
Thai fish sauce
cilantro

Heat the coconut oil in a large dutch oven. Add the onions and saute until transluscent. Add the squash, rice, and vegetable stock and bring to a simmer until squash is tender.

Blend carefully in small batches and return to stove. Add the coconut milk, cayenne, curry paste, lemon grass, soy sauce, kefer lime leaves (if using) or lime zest. Heat until almost to a simmer, and keep that way for 10 minutes. Squeeze in the lime. Add the fish sauce and cilantro before serving, but keep some out for the strict vegetarians or those unlucky few who can't eat cilantro. Add salt if necessary.

The lemon grass stalks can be used as garnish in the bowl or removed.
Posted by Picasa